So since I had a few weeks of break between graduation and med school, I decided it was time to do all the crafts I had postponed for four years. I would seriously spend all day at thrift stores and craft shops if I could. But since I am pretty limited on funds (thanks loans), time (thanks homework), and apartment space (thanks dorm rooms), I have had to limit my crafting for quite a while now. But with three weeks of free time and a new apartment to fill, it was time to…
FINALLY 😀 So I combed through Pinterest to find a nice simple craft to begin my said journey and ended up with:
CRAFT #1: Wine-bottle flower vase
What you need: wine bottle, paint, hot glue, beads or twine
- Drink wine. (Best part)
- Make sure the bottle is clean and dry on the inside. Remove labels.
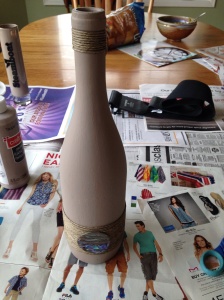
- But paint (make sure it works on glass). I used chalkboard paint.
- Decorate the outside with any sort of beads, shells, rope, etc. Hot glue works pretty well. I bought a roll of brown twine and wrapped it around and around the base to make a sort of stripe in the middle, before gluing a pendant to the center.
- Add flowers!
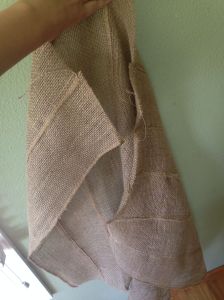
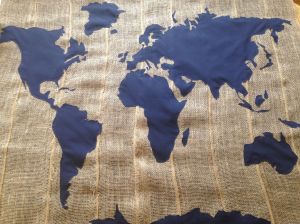
Well, that was all fine and dandy, but it took me all of half an hour to make (post drinking and purchasing of materials, of course). So for the next craft, I decided to branch out and make my own invention, no Pinterest allowed. The inspiration for this craft was a map. Or, more specifically, several maps, i.e. the ones I had looked up on Amazon and wanted to buy but couldn’t afford. I didn’t want just another poster for my room, after all. I wanted something that would have a bit more flair, something more like art. So I dug through my closet of random nicknacks and came up with a roll of burlap ribbon that I had never used and a walking stick from my brother’s Boy Scout days that had ended up sitting in the closet corner. And those things got me to plotting…
CRAFT #2: The Map Mural
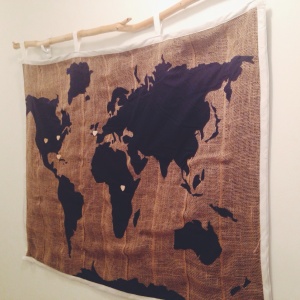 What you need: Burlap fabric (3’x5′), Plain fabric (3’x5′) x2, hot glue, sewing machine and thread, border ribbon, stick (to hang)
- Measure how big an art piece you want on your wall (length x width)
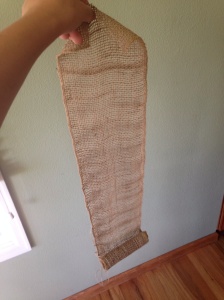
- Cut fabric to fit those dimensions. OR, if you are using burlap ribbon (like me), cut the roll into strips appropriate for the desired length and then sew them together into one big sheet using a sewing machine. Sew the strips together until you get the desirable width. Or miss and stitch your fingers to the fabric (like me).
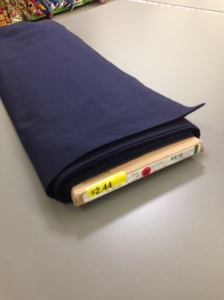
- Find plain fabric from WalMart in your favorite color (I used navy) and measure out your dimensions. Purchase two of these. It should only cost around $5 total.
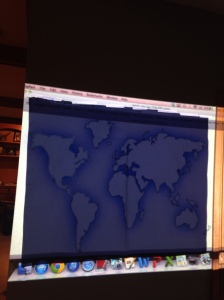
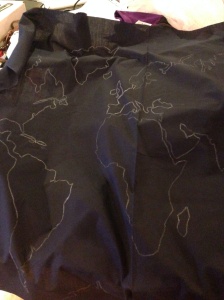
- Google “map outline” and project your chosen image onto a wall. Tape one of your two WalMart fabric bolts onto the same spot and trace the outline onto the fabric with a white colored pencil.
- Cut out the countries you just traced.
- Hot glue them to the burlap.
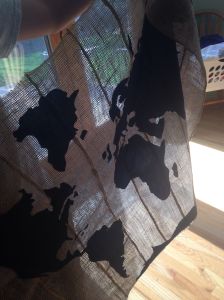
- Take the 2nd WalMart fabric bolt and hot glue (or sew) it to the back of the burlap to provide a background.
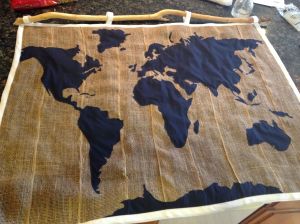
- Using the sewing machine, stitch the border ribbon around all four edges of the burlap. This will keep it from fraying and make it look pretty 🙂
- If you have extra border ribbon, sew three or four loops at the top of the map.
- Use a stick or pole through those loops to hang the map on a wall
- OPTIONAL: Glue little hearts or buttons onto places you’ve lived to make it more personal!
 Fabulous! Wellthat was fun. Anyways, on to the third and final project…
CRAFT #3: Redesigned Ikea Furniture
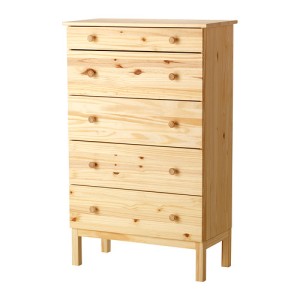
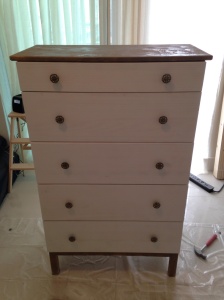 What you need: Plain Ikea furniture, spray paint, drop cloth, drawer knobs (there are some cool ones at Anthropologie or Urban Outfitters if you want to get fancy!)
- Put together Ikea furniture using Swedish instruction manual. Harder than it looks, trust me.
- For a dresser, remove all the drawers from the dresser. Remove the knobs, too.
- Think of what sort of pattern or “feel” you want for your room. Are you a plain and simple kind of person? Great! Paint it all white! Are you more the artistic type? Have at it, Van Gogh!
- I personally wanted a two-toned dresser to match my white and navy room. So I used a flat white spray paint to coat the drawers and a textured copper/brown spray paint to coat the dresser exterior and top. I did run out of brown paint, though, which forced me to get sort of creative to finish the last side! NOTE: ACE Hardware sells pint-sized sample paints (you can even get one custom-mixed!) for only $3-4 or so 😀
- When paint has dried, screw on your custom dresser knobs and replace the drawers.
- ANOTHER NOTE: Don’t try this in an apartment on the 19th floor. Or maybe do. S0me of us only learn from our own mistakes haha 😛
So that’s it! Now that we’ve officially started school (although let’s be real, it’s basically study abroad right now) I won’t have too much time to devote to crafts, much as I’d love to. But I hope my blunderings come in handy for all you other crafty people out there! Enjoy and good luck! Cheers, Cathy
